Welcome to our comprehensive guide on night shooting with GoPro cameras. In this article, we will provide you with valuable tips and techniques to capture stunning images in low light conditions. Whether you are an amateur photographer or a professional filmmaker, these tips will help you make the most of your GoPro’s capabilities for night photography and videography.
Shooting in low light situations can be challenging, but with the right knowledge and equipment, you can achieve impressive results. We will cover everything from choosing the best GoPro model for night shooting to optimizing settings, composition tips, and essential gear.
Are you ready to take your night photography to the next level? Let’s dive in and discover how to capture breathtaking images with your GoPro in any low light environment.
Best GoPro for Night Shooting: Hero11 Black
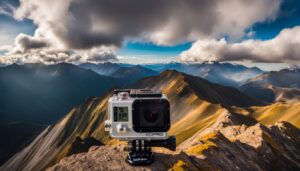
The newly released GoPro Hero11 Black is the ultimate choice for capturing breathtaking night photos and videos. Equipped with advanced features specifically designed for low light conditions, the Hero11 Black delivers exceptional performance and stunning results.
With its Night Photo and Night Lapse modes, the Hero11 Black automatically adjusts the shutter speed to optimize image quality in dark environments. This ensures that your night shots are well-exposed and free from blur or grain, allowing you to capture the beauty of the night with unparalleled clarity.
The Hero11 Black offers significant improvements over previous GoPro models, making it the top recommendation for night shooting. Its enhanced sensor and improved image processing capabilities provide superior image quality, even in challenging lighting conditions.
When it comes to night photography and low light videography, the Hero11 Black sets a new standard. Whether you’re capturing starry night skies, cityscapes, or nocturnal adventures, this GoPro is the ideal companion for creating stunning visuals that will leave your audience in awe.
Take your night shooting to the next level with the GoPro Hero11 Black and unlock the limitless possibilities of low light photography.
See the Hero11 Black in action:
Make the Most of Night Photo and Night Lapse Mode
If you have a GoPro with night modes, such as Night Photo and Night Lapse, it’s important to make the most of these features. These modes provide more control over settings like shutter speed, allowing you to capture better quality night photos and videos. Night Lapse mode also offers a range of interval settings, depending on how quickly the light changes in the scene. By using these modes, you can enhance your night shooting capabilities and achieve stunning results.
Adjusting GoPro Settings for Night Photo Mode
To maximize the potential of your night photos, consider the following GoPro settings:
- Shutter Speed: Experiment with longer exposure times to capture more light and details in the darkness.
- ISO: Adjust the ISO setting to control the camera’s sensitivity to light. Higher ISO values can help in extremely low-light conditions, but they may also introduce more noise to the image. Test different ISO settings to find the optimal balance between brightness and noise reduction.
- ProTune: Enable ProTune to have more control over settings like color, sharpness, and exposure. This allows you to fine-tune your night photos during post-processing.
Night Lapse Mode Interval Settings
Night Lapse mode is perfect for capturing long-duration time-lapse videos in low-light environments. Choose the appropriate interval setting based on the rate of light change in your scene:
| Interval Setting | Recommended Scene |
|---|---|
| Auto | Scenes with rapid changes in light, such as fireworks or cityscapes with moving cars |
| 4 Seconds | Scenes with moderate light changes, like a sunset or sunrise |
| 5 Seconds | Scenes with gradual light changes, such as the stars moving across the night sky |
| 10 Seconds | Scenes with very slow light changes, like the moon rising or a cityscape transitioning from day to night |
By utilizing Night Photo and Night Lapse modes effectively, you can unlock the full potential of your GoPro in low-light conditions. These modes allow you to capture stunning imagery and create incredible time-lapse videos. Experiment with different settings to find your desired aesthetic and showcase the beauty of the night.
Include a Light Source When Taking Photos
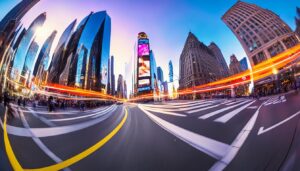
When it comes to night photography, capturing the perfect shot can be a challenge due to low light conditions. However, there is a simple yet effective technique that can greatly improve your night photos: including a light source in your composition. By incorporating a light source, such as lit-up buildings, bridges, or street lamps, you can enhance the overall quality of your images and avoid overexposed or grainy pictures.
Including a light source in your frame allows you to keep the ISO as low as possible, resulting in cleaner and sharper images. Without a light source, you may need to raise the ISO to compensate for the lack of available light, which can introduce noise and reduce image quality. By utilizing existing light sources in your scene, you can maintain image clarity and achieve the right balance of light and shadow.
Whether you’re shooting cityscapes, landscapes, or even portraits, the strategic placement of a light source can transform your night photos into stunning works of art. Experiment with different compositions and angles to find the most visually appealing results. Additionally, consider using long exposure techniques to capture light trails and create a sense of motion in your photos.
Remember, including a light source in your night photography composition is a valuable tool for capturing beautiful images in low light conditions. Utilize the natural or artificial light available in your surroundings to add depth, contrast, and visual interest to your photos. With this technique, you can take your night photography skills to new heights and create captivating images that truly stand out.
| Night Photography Tips: Including a Light Source |
|---|
| Keep your ISO as low as possible |
| Avoid overexposed or grainy pictures |
| Include lit-up buildings, bridges, or street lamps |
| Enhance image clarity and balance of light and shadow |
| Experiment with different compositions and angles |
| Utilize long exposure techniques for light trails |
| Create depth, contrast, and visual interest |
Use a Lower Frame Rate for Night Filming
When filming at night, one of the key considerations is the frame rate. To capture optimal footage in low light conditions, it is recommended to use a lower frame rate. This allows the camera to capture more light over a longer period, resulting in brighter and clearer footage.
Why use a lower frame rate?
A lower frame rate gives the camera more time to gather light, ensuring that important details are captured even in low light conditions. By using a slower frame rate, you can avoid footage that appears excessively dark or lacks clarity.
During the editing process, it is easier to adjust the brightness and add details to footage shot at a lower frame rate compared to correcting excessive darkness. This gives you more flexibility in post-production to enhance the overall quality of your night filming.
By following this approach, you can achieve brighter and more detailed footage when filming at night, capturing the true essence of your subject under challenging lighting conditions.
Use the GoPro App to Check Image Quality
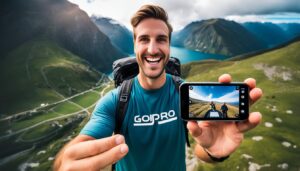
The GoPro app is an invaluable tool for assessing the image quality of your night photography. While the screens on GoPro cameras offer a glimpse of your photos and footage, they can be limiting in size and detail. By utilizing the GoPro app, you gain the advantage of a larger display that allows for a more thorough evaluation of your images.
When it comes to night photography, image quality is of utmost importance. The app enables you to zoom in on your photos, providing a closer look at the clarity and sharpness. This level of inspection ensures that your night photos and videos meet the highest standards and deliver exceptional results.
In addition to assessing image quality, the GoPro app allows you to make real-time adjustments to your camera settings. This feature is particularly useful for night photography, as it enables you to fine-tune settings like exposure compensation, white balance, and ISO before you begin your shooting session. By using the app, you can optimize your camera’s settings and capture the best possible night shots.
Whether you’re an amateur or professional photographer, the GoPro app is an indispensable tool for enhancing your night photography. With its ability to check image quality, make adjustments, and provide a larger, detailed view of your photos and videos, the app ensures that you capture the most stunning night shots with your GoPro camera.
“The GoPro app allows for a more comprehensive evaluation of the image quality, ensuring that your night photography produces exceptional results.”
Advantages of Using the GoPro App for Night Photography:
- Better assessment of image clarity and sharpness
- Zoom in on photos for close inspection
- Real-time adjustments to camera settings
- Optimize settings before shooting
Incorporating the GoPro app into your night photography workflow is a game-changer. Take advantage of this powerful tool to ensure that your night photos and videos are of the highest quality.
Choose Maximum Resolution for Night Photos
When shooting night photos with your GoPro, it’s advisable to choose the maximum resolution available. This ensures that your images have the most detail and clarity, preventing blurriness and preserving image quality. By opting for a higher resolution, such as 4K, you have more flexibility during post-production editing and cropping. The higher resolution also helps overcome the inherent lack of clarity in night shots.
Benefits of Shooting at Maximum Resolution
There are several advantages to selecting the maximum resolution for your night photos:
- Enhanced Detail: Higher resolutions capture more details, allowing you to preserve fine textures and sharpness in your images, even in low-light conditions.
- Increased Flexibility: Shooting at maximum resolution provides more room for post-production edits and adjustments, such as cropping or zooming in on specific areas of the image without sacrificing quality.
- Reduced Image Noise: Night shots often suffer from visible noise or graininess. Choosing a higher resolution helps mitigate this issue and produces cleaner, smoother images.
When you select the maximum resolution, your GoPro camera utilizes its sensor to capture more image data, resulting in higher-quality night photos. This ensures that your final images accurately represent the scene and offer superior image clarity.
Sample Table: Maximum Resolution Comparison
| GoPro Model | Maximum Resolution |
|---|---|
| GoPro Hero9 Black | 5K |
| GoPro Hero8 Black | 4K |
| GoPro Hero7 Black | 4K |
Optimizing Storage Space
Keep in mind that shooting at the maximum resolution captures more data, which may result in larger file sizes. Ensure that you have enough available storage space, such as a high-capacity memory card, to accommodate these larger files. It’s also essential to regularly backup your images to safeguard them and create room for new captures.
By selecting the maximum resolution for your night photos, you can capture stunning and detailed images that showcase the beauty of low-light environments. Remember to adjust other camera settings such as ISO and shutter speed accordingly to achieve optimal results.

Take Practice Shots Before Capturing Night Photos
If you’re new to night photography with your GoPro, taking practice shots is an essential step before starting your main shoot. This allows you to familiarize yourself with the camera settings and make necessary adjustments for optimal results.
- Get to know your GoPro: Spend some time exploring the various settings and features of your GoPro camera. Familiarize yourself with the modes, such as Night Photo and Night Lapse, that are specifically designed for night shooting.
- Experiment with different settings: Take a series of practice shots using different settings to see how they affect the outcome. Adjust the ISO, shutter speed, and white balance to find the perfect balance for your desired shot.
- Check for exposure: Look closely at your practice shots to ensure that they are properly exposed. Pay attention to any areas that are overly bright or too dark. This will help you fine-tune your settings and avoid any potential issues during your main shoot.
- Evaluate image quality: Assess the quality of your practice shots to identify any issues such as excessive graininess or blurriness. This will allow you to make necessary adjustments to enhance image clarity and sharpness.
Practice shots are invaluable for refining your settings, improving your night shooting skills, and avoiding potential disappointments when capturing your main night photos.
By taking the time to practice, you can ensure that your images are properly exposed, free from excessive grain or blurriness, and meet your desired quality standards.
| Benefits of Practice Shots | Key Takeaways |
|---|---|
| 1. Familiarize yourself with camera settings | • Get to know your GoPro and its night modes |
| 2. Experiment with different settings | • Adjust ISO, shutter speed, and white balance |
| 3. Check for proper exposure | • Avoid overexposed or underexposed photos |
| 4. Evaluate image quality | • Identify and address quality issues |
Practice shots serve as a valuable opportunity to refine your GoPro settings, improve your night shooting skills, and ensure exceptional results when capturing your main night photos.
Adjust ISO Settings for Low-Light Environments
When shooting at night or in low-light conditions, manually adjusting the ISO settings on your GoPro is crucial to achieving optimal results. By setting the ISO appropriately, you can control the camera’s sensitivity to light, ensuring that your photos and videos are properly exposed and free from excessive noise.
In environments with minimal light pollution, such as when capturing the night sky, a recommended ISO setting is around 800. This value allows the camera to gather enough light while maintaining relatively low noise levels. However, keep in mind that the optimal ISO setting can vary based on factors such as the available ambient light and the desired exposure.
In locations with significant light pollution, like urban settings, it’s important to strike a balance between capturing enough light and avoiding overexposure. Aim for the lowest ISO setting that still maintains image brightness and detail without making the scene unnaturally dark. Experimentation and test shots can help you determine the ideal ISO value for your specific shooting conditions.
Remember, higher ISO settings increase the camera’s sensitivity to light, but they can also introduce more digital noise into your photos and videos. Therefore, it’s generally recommended to use the lowest ISO setting that allows you to achieve the desired exposure without compromising image quality.
Tips for Adjusting ISO Settings:
- Start with a lower ISO setting and gradually increase it if needed.
- Review your test shots to assess the level of noise in the image.
- Consider using the GoPro app to preview your photos and evaluate image quality on a larger screen.
- Experiment with different ISO settings to find the balance between brightness, noise, and image clarity.
By taking control of your ISO settings in low-light environments, you can enhance your night shooting capabilities and capture stunning photos and videos with your GoPro.
Shoot in Protune Flat for Night Footage
When capturing night footage with your GoPro, shooting in Protune flat mode is highly beneficial. While the unedited footage may appear washed out in terms of color, shooting in Protune flat preserves more details in the shadows and highlights. This allows for better control and adjustment during the editing process. By shooting in Protune flat, you can achieve more balanced lighting, reduce grain, and create visually stunning night videos.
Protune flat mode is specifically designed for professional videography, providing a neutral color profile that is ideal for color grading and post-production adjustments. By capturing your night footage in Protune flat, you have greater flexibility when it comes to enhancing the colors, tones, and contrast to match your creative vision.
“Shooting in Protune flat mode for night footage gives you the freedom to truly unleash your creativity during the color grading process.”
Whether you want to enhance the mood of a nighttime cityscape, capture the mesmerizing colors of the night sky, or highlight the intricate details in low-light environments, shooting in Protune flat allows you to achieve professional-level results.
Color Grading Tips for Night Videography
Color grading is an essential part of the post-production process when working with night footage. Here are a few tips to help you achieve the desired results:
- Adjust Contrast and Saturation: Experiment with your editing software’s contrast and saturation controls to enhance the colors and tones in your night footage. Be careful not to overdo it, as subtlety often creates more visually pleasing results.
- Balance Shadows and Highlights: Night scenes often have a wide range of shadows and highlights. Use your editing software’s tools to maintain detail in both the dark and bright areas of your footage.
- Add a Touch of Warmth: If you want to create a cozy and inviting atmosphere in your night videos, consider adding a slight warm color cast to evoke a sense of warmth and comfort.
- Emphasize Cool Tones: On the other hand, if you want to enhance the mysterious and ethereal qualities of the night, amplifying cool blue tones can create a striking visual effect.
Remember, color grading is a subjective process, and your creative choices should align with the intended mood and narrative of your night footage. Experiment, trust your instincts, and don’t shy away from trying new techniques to achieve your desired visual style.

Pay Attention to Shutter Speed for Night Photos
In the world of night photography with GoPro cameras, mastering the art of shutter speed is essential. The shutter speed you choose determines how long the camera’s sensor is exposed to light and directly affects the outcome of your night photos. Different shutter speeds are required to capture specific night scenes and lighting conditions, allowing you to achieve the desired results.
To capture the beauty of a starry night sky or scenes with minimal light, a longer shutter speed is recommended. A setting of around 30 seconds allows enough time for the camera to absorb as much light as possible, resulting in stunning, detailed night photos. This longer exposure brings out the mesmerizing beauty of the celestial objects and creates a sense of motion in the stars.
However, in situations where there is some ambient light or when you want to capture light trails, a shorter shutter speed is more appropriate. A setting of 20 seconds or less allows you to freeze the action while still capturing the essence of the low-light environment. This is particularly useful when photographing urban settings with moving cars or busy streets.
Understanding the impact of shutter speed on your night photos is crucial for achieving excellent results. Experimenting with different settings and analyzing the outcomes will help you identify the ideal shutter speed for each unique shooting scenario.
Whether you’re capturing the brilliance of the night sky or exploring the mysterious allure of the cityscape after dark, paying attention to shutter speed is key to unlocking the full potential of your GoPro’s night photography capabilities.
Conclusion
Night shooting with GoPro cameras presents an amazing opportunity to capture breathtaking images and footage in low-light conditions. By following the expert tips and techniques provided in this comprehensive guide, you can maximize the nighttime capabilities of your GoPro and achieve outstanding results.
Choosing the right GoPro model for night shooting is essential, and the newly released GoPro Hero11 Black is highly recommended for its advanced features, including Night Photo and Night Lapse modes. These modes automatically adjust the camera settings for dark and low-light settings, allowing you to capture stunning night photos and time-lapse videos effortlessly.
Properly setting the ISO and utilizing the appropriate shutter speed are crucial factors in night shooting. Adjusting the ISO settings based on the level of ambient light ensures optimal image brightness without compromising quality. Understanding the impact of shutter speed on your night photos enables you to capture the desired effect, whether it’s starry skies or light trails.
Furthermore, using the GoPro app to check image quality, including a light source in your composition, and shooting in Protune flat mode for nighttime footage are additional techniques to enhance your results. With practice, experimentation, and a deep understanding of these tips and techniques, you can master night shooting with your GoPro and create impressive and captivating visuals.
FAQ
What is the best GoPro for night shooting?
The best GoPro for night shooting is the Hero11 Black. It features Night Photo and Night Lapse modes specifically designed for low-light settings.
How can I make the most of Night Photo and Night Lapse mode?
Night Photo and Night Lapse modes provide more control over settings like shutter speed, allowing you to capture better quality night photos and videos.
Should I include a light source when taking photos at night?
Yes, including a light source in your composition, such as lit-up buildings or street lamps, helps maintain image clarity and balance of light and shadow.
What frame rate should I use for night filming?
It’s recommended to use a lower frame rate for night filming to capture more light. Slower frame rates result in brighter footage.
Should I use the GoPro app to check image quality for night photography?
Yes, using the GoPro app allows you to view your images in a larger size and better assess their clarity and sharpness.
Should I choose the maximum resolution for night photos?
Yes, choosing the maximum resolution available ensures that your night photos have the most detail and clarity.
Should I take practice shots before capturing night photos?
Yes, taking practice shots allows you to familiarize yourself with the camera settings and make any necessary adjustments for optimal results.
How should I adjust ISO settings for low-light environments?
For environments with minimal light pollution, an ISO setting of 800 is generally recommended. In areas with significant light pollution, aim for the lowest ISO that maintains image brightness without making it too dark.
Should I shoot in Protune Flat for night footage?
Yes, shooting in Protune Flat mode preserves more details in the shadows and highlights, allowing for better control and adjustment during the editing process.
How does shutter speed affect night photos?
Different shutter speeds are needed to capture specific night scenes and lighting conditions. Understanding how shutter speed works helps achieve the desired results in night photography.
What can I learn from this guide on night shooting with GoPro cameras?
This guide provides valuable tips and techniques for night shooting with GoPro cameras, including choosing the right GoPro model, utilizing night photo and night lapse modes, adjusting ISO and shutter speed, and more.
Source Links
- https://storytellertech.com/gopro-night/
- https://gopro.com/help/articles/how_to/How-to-Use-Night-Photo-Night-Lapse?sf112403617=1
- https://www.livemoretravelmore.com/how-to-take-a-night-photo-with-a-gopro/