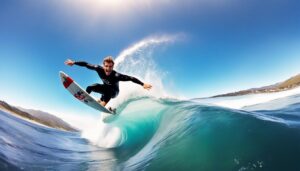
Welcome to our guide on how to create your own DIY GoPro chest harness for hands-free action footage. With a custom harness, you can have full control over the positioning and stability of your GoPro camera, ensuring that you capture the perfect shots every time.
By building your own harness, you have the freedom to customize it according to your preferences and needs. No more compromising on comfort and functionality. Get ready to take your GoPro adventures to the next level with a harness that is tailored to you.
To get started, gather the necessary materials and tools. You will need two 1″ wide, 36″ long nylon straps with adjustable buckles, 2 yards of 1-1/2″ wide elastic strap, a 1-1/2″ adjustable plastic buckle, a 5″ x 5″ piece of hard plastic, a 1/4″-20 x 3/4″ long screw, 2 fender washers, a friction washer, and a small piece of craft foam. Additionally, you’ll need a drill, utility knife, scissors, staplers, lighter, and file/sandpaper. Optional items include a Pedco Ultramount, full fisheye lens, and a universal adapter for lenses.
Step-by-Step Guide to Building the Harness
Follow these steps to build your DIY GoPro chest harness:
Cutting the Plastic Center Mount
Use a utility knife to score and snap a 5″ x 5″ piece of hard plastic. Round off the corners with a file or sandpaper, and drill strap holes.
Installing the Center Mount
Screw the center mount to the plastic.
Installing the Chest Strap
Cut the elastic strap to size, thread it through the buckle, and secure it with staples.
Installing the Shoulder Straps
Attach the shoulder straps to the center mount using keepers.
Final Strap Assembly
Use keepers to hold all the strapping in place.
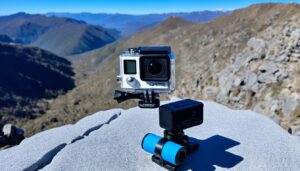
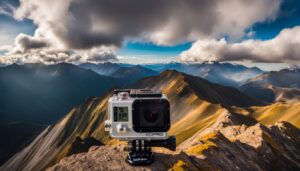
Finished Harness
Adjust the position of the camera according to your liking using the Pedco Ultramount.
| Step | Description |
|---|---|
| 1 | Cutting the Plastic Center Mount |
| 2 | Installing the Center Mount |
| 3 | Installing the Chest Strap |
| 4 | Installing the Shoulder Straps |
| 5 | Final Strap Assembly |
| 6 | Finished Harness |
Building your DIY GoPro chest harness is a straightforward process involving several key steps. By following this step-by-step guide, you can create a harness that securely holds your GoPro camera for hands-free filming. Whether you’re capturing action footage during sports activities or documenting your outdoor adventures, this custom-built harness will provide stability and comfort. Take the first step in building your GoPro chest harness today and elevate your filming experience.
An Alternative DIY GoPro Chest Mount
Another option for a DIY GoPro chest mount involves repurposing a black plastic base from the packaging of a GoPro camera. By cutting slots in the mounting base, attaching web strapping and snap buckles, and adjusting the straps for proper sizing, you can create a suitable chest mount. This project can be completed quickly and inexpensively, costing less than $10 for materials.
Repurposing the black plastic base provides a sturdy foundation for your DIY GoPro chest mount. The black plastic base, typically used to secure the camera in its original packaging, is durable and lightweight, making it ideal for this project. By upcycling this item, you can reduce waste and create a functional mount for capturing your action-packed adventures.
To begin, gather the following materials:
- Black plastic base from GoPro packaging
- Web strapping
- Snap buckles
- Scissors or utility knife
Once you have these materials ready, follow these steps:
- Cut slots in the black plastic base: Use a pair of scissors or a utility knife to carefully cut slots in the plastic base. These slots will allow you to attach the web strapping and snap buckles securely. Make sure the slots are wide enough to accommodate the strapping and buckles, but not too wide that they compromise the integrity of the base. Aim for evenly spaced slots along the edges of the base.
- Attach the web strapping: Thread the web strapping through the slots in the black plastic base. Pull the strapping through each slot tightly, ensuring a secure fit. Leave enough strapping on each side to allow for adjustment and comfortable wear.
- Add the snap buckles: Once the web strapping is threaded through the slots, attach the snap buckles to each end. This will allow you to easily secure and adjust the chest mount when wearing it. Make sure the buckles are firmly attached and can withstand the weight of the GoPro camera.
- Adjust and test the fit: Put on the chest mount and adjust the straps as needed to achieve a snug and comfortable fit. Ensure that the GoPro camera is positioned securely and at the desired angle for capturing your footage.
Example Image:

With your alternative DIY GoPro chest mount complete, you can now confidently wear your camera and capture hands-free action footage. Whether you’re skateboarding, biking, or engaging in any other adrenaline-pumping activity, this DIY mount offers a convenient and custom solution for capturing your adventures from a chest-level perspective.
Conclusion
Creating your own DIY GoPro chest harness is a fantastic way to customize a hands-free mount for your GoPro camera. Whether you choose to follow the step-by-step guide or explore the alternative solution using a black plastic base, web strapping, and snap buckles, you can achieve stable and adjustable positioning for capturing incredible action footage.
By crafting a DIY GoPro chest harness, you have the freedom to tailor the mount to your specific needs and preferences. The step-by-step guide provides detailed instructions on assembling the harness with easily accessible materials. Alternatively, repurposing a black plastic base offers a quick and economical alternative that does not compromise on functionality.
With your homemade GoPro chest harness, you can immerse yourself in the action, leaving your hands free to focus on your adventure. Capture stunning footage from unique perspectives without the need for assistance. Start your DIY project today and elevate your filming experience with a custom mount that perfectly suits your needs.
FAQ
What materials and tools do I need to create my own GoPro chest harness?
What are the steps to build a DIY GoPro chest harness?
Is there an alternative DIY GoPro chest mount option?
Why should I create my own DIY GoPro chest harness?
Source Links
- http://www.carolinawildphoto.com/chestmount.htm
- https://www.instructables.com/DIY-Camera-Chest-HarnessMount-GoPro-Inspired/
- https://www.instructables.com/GoPro-camera-chest-mount-for-Camelbak/